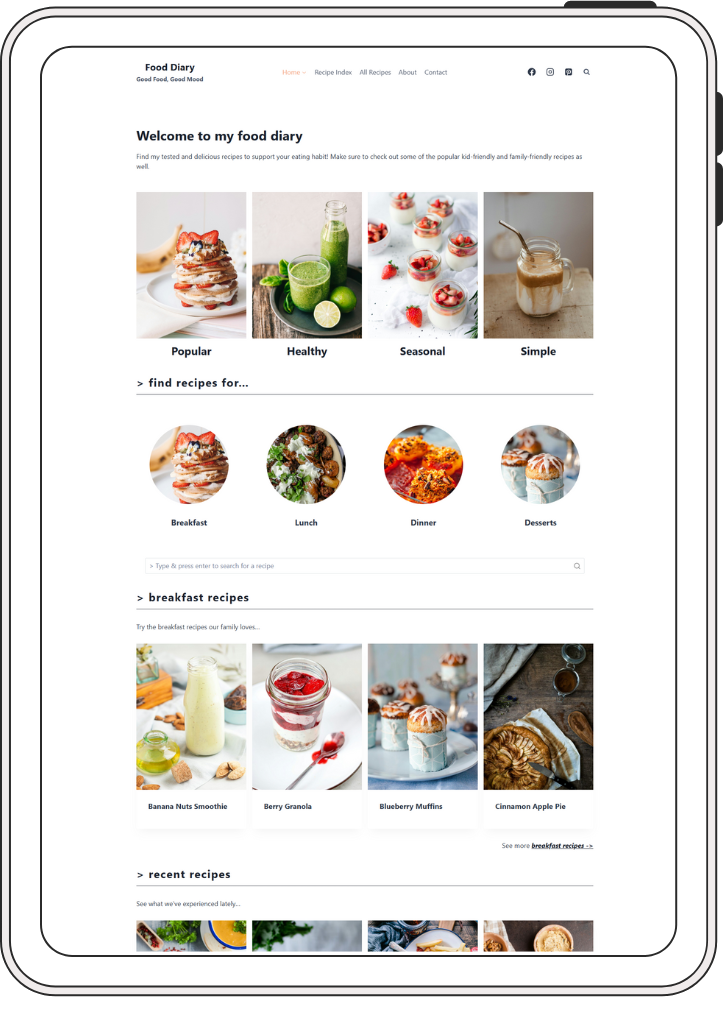
Foodie Diary
Thanks for choosing Foodie Diary Kadence Child Theme! Please follow the instructions below to create your site just like the demo site. If you run into problems, please check the troubleshooting section which addresses common problems that our customers have encountered. However if you have questions while following the tutorial please contact me and I will be happy to help out.
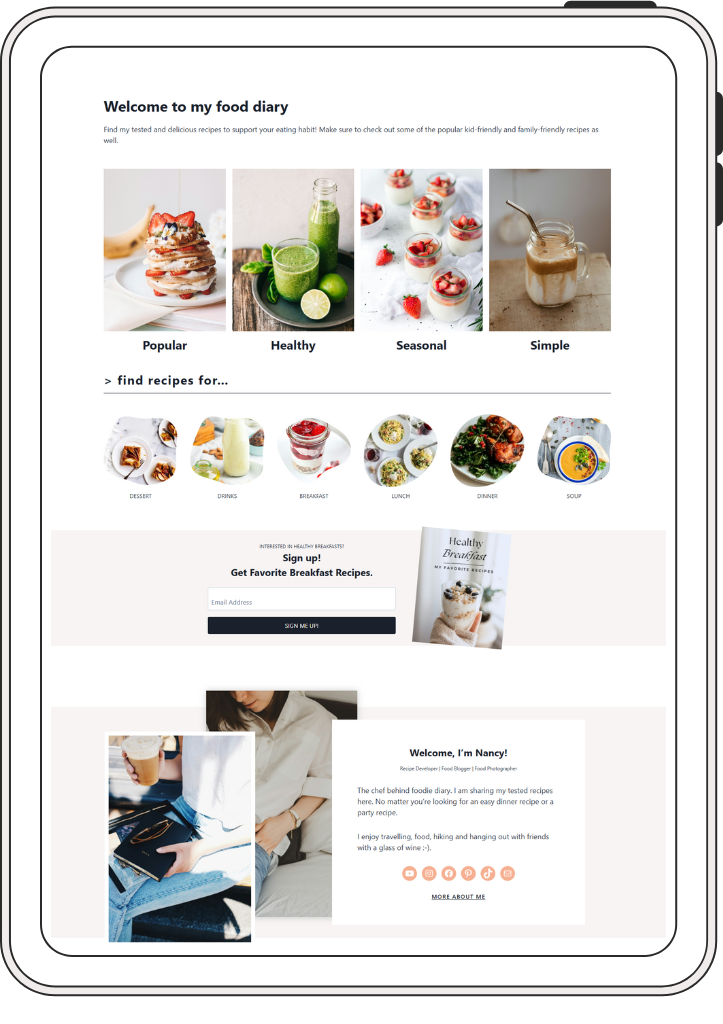
Installation Service
If you prefer to sit back and relax, and have somebody install and customize the theme to look like the demo site for you, we can definitely help with our Installation and Setup Service. Just send us a support ticket, we will take care of it with a small fee.
Getting Started
How To Install The Theme & Import Demo Content
This post explains how to install the theme and configure your new site to look exactly like the demo.
Adjust the sidebar to be like the demo
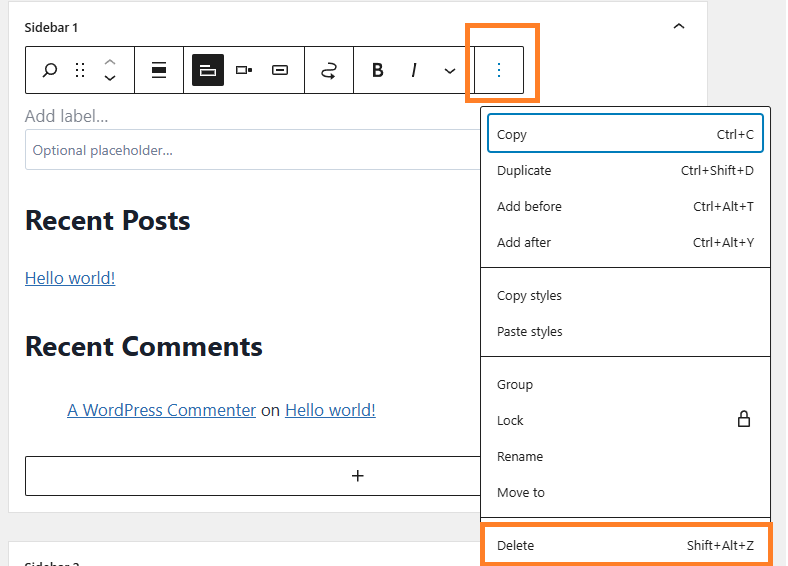
Once the theme has been installed, the sidebar 1 and sidebar 2 contain some default blocks. They look like this:
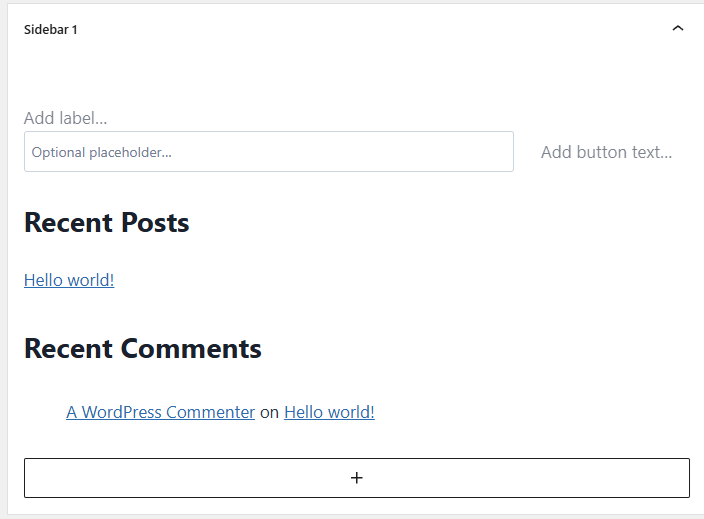
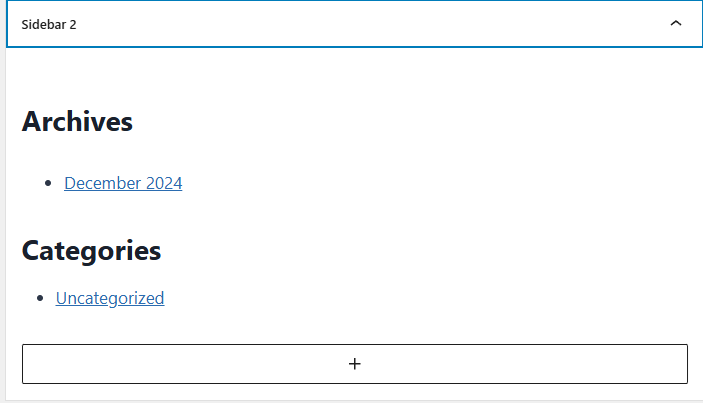
If you prefer to have the same sidebar design as the demo site, then these blocks should be deleted. Simply select each block by clicking on it, then click on the 3 dots, then delete.
How to use WP Recipe Maker Plugin
It is recommended to create a recipe card for each recipe post. Recipe card not only helps improve your SEO and get more visitors, but also facilitates visitors to follow your recipes easily.
In Foodie Diary theme, WP Recipe Maker plugin is used to create recipe card. It is a popular plugin widely used by food bloggers, recipe developers and people who want to include recipes on their websites.
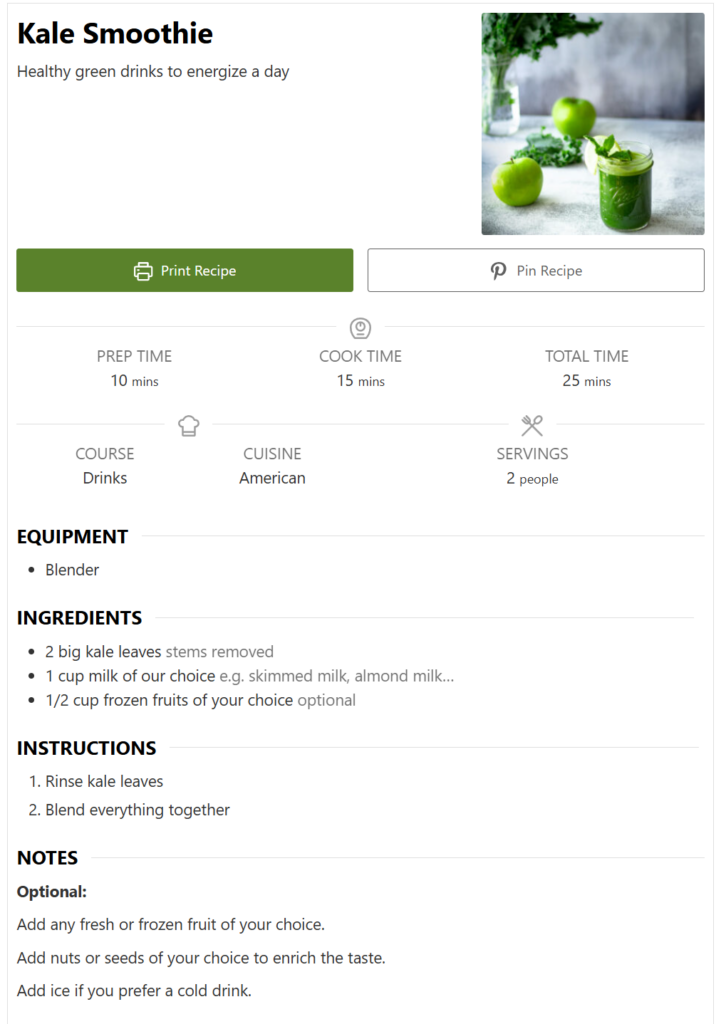
If demo contents of the theme have been successfully imported to the site, you’ve probably noticed that some blog posts already have recipe cards in the post. For example, this kale smoothie recipe. A recipe card looks like this:
To learn how to use WP Recipe Maker to create a recipe card, This easy-to-follow tutorial gets you started with your first recipe card quickly.
Interested to learn more? WP Recipe Maker has plenty of helpful online documentation and video tutorials.
How to change the menu
You can add pages, posts, categories, and custom links to the menu. If you plan to add pages, posts, categories to the menu, make sure to create them in advance on your site. Foodie Diary theme has only primary menu, which is just an usual WordPress menu. No mobile menu, footer menu or secondary menu defined.
If this is your first time to create a menu in WordPress, please follow this video tutorial.
How to Edit Header/Logo and Footer/Widgets
This video tutorial from Kadence WP explains very well how header builder and footer builder work in Kadence. More specifically:
00:03:15 Header Builder
00:07:55 Footer Builder
Header Builder
To make changes to the header, go to Appearance > Customize > Header.
Please watch the video below on how to customize the header.
Footer Builder
To make changes to the footer, go to Appearance > Customize > Footer.
Please watch the video below on how to customize the footer.
Blog post, Categories, Tags, Sidebars
Blog Post
First, create post categories and tags that fit your blog niche.
If this is your first time working with WordPress, this video tutorial is a good resource to learn how to create categories and tags.
Second, create blog posts.
Third, make sure to add a feature image in the blog post and choose a proper category for the post. Tag is optional.

Sidebars
Please watch the video below on how to make changes to the sidebars used in the Foodie Diary theme.
How to reuse blocks
You may want to reuse some blocks in a new page. This can be achieved easily in any of the 2 following ways:
- Use the simple copy and paste functions on your computer. This Kadence video explains well.
- Use reusable blocks within the WordPress editor. This blog post explains how to create a reusable block, and how to add them to pages.
How to add, delete a social icon
Social icons appear in several places in Foodie Diary Theme. All of them use Social Icons block. The video below uses Emily Winter theme as an example to show how to add and delete a social icon on your site.
How to set up contact form
People will use the contact form on your site to contact you for questions or inquiries. In order to receive messages from your contact form, you need to customize it. Here is a Kadence blog post explaining how to set up a Kadence contact form.
The video below uses Emily Winter theme as an example to explain how to set up the contact form. IMPORTANT: Once the form is set up, make sure to test it by filling up the form in the live site on your own. Any questions, feel free to contact me.
How to add your subscription box (Important)
You might want to add a subscription box for newsletter on your site to collect emails and add them to the audience in your email subscription service. I used the MailChimp as an example, but you can use the provider of our choice such as MailerLite, ConvertKit and so on.
If you’re using CovertKit, this post shows how to create a form in ConvertKit and add it to WordPress.
No matter which software you use, essentially it is a 3-step process:
- Create a form in the email service software of your choice.
- Grab the HTML or Javascript code of the embedded form.
- Replace the HTML code with your code.
Foodie Diary Theme
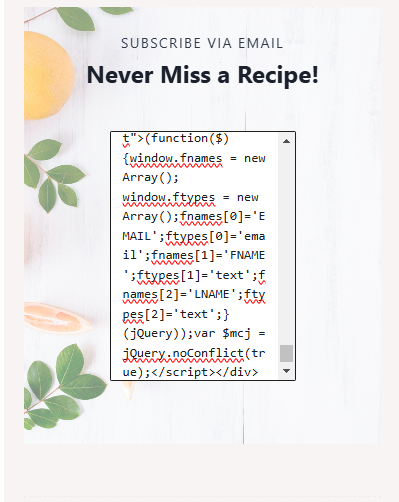
Subscribe form is used in the Homepage 2 and Subscribe page. Make sure to replace the HTML code with your own code.
How to make changes to the images and content
Once the Kadence child theme is installed and you’re ready to put in your branding and contents. Please watch the video below on how to make changes to images and contents on the homepages.
How to change colors and fonts
You can change the colors and fonts used for the entire site or for a page. The video below uses Emily Winter theme as an example to explain how to set up the fonts and colors on your website.
How to make changes to the Recipe Index page
Please watch the video below on how to make changes to the Recipe Index page.
Set up eBook download
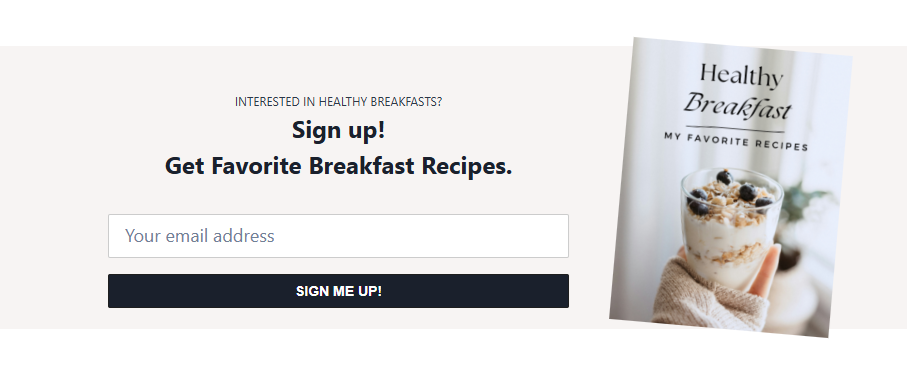
The second homepage includes a sign-up form to download an eBook. It looks like this:
Downloading an eBook consists of 2 parts:
1- Capture the emails of the sign-ups via a form on the site.
2- Add the captured emails to an email marketing platform of your choice and deliver the eBook to the sign-ups.
This process (especially the second part) requires an integration to an email marketing platform. There are many email marketing platforms in the market such as MailChimp, ConvertKitIn and so on. In the Foodie Diary theme, MailChimp is used as an example for demonstration purpose. If you choose other platforms, please consult their help documents on how to set it up.
MailChimp
1 – Create sign-up form using MailChimp
Please watch the video below on how to create a sign up form using MailChimp.
IMPORTANT:
- Connect to MailChimp account
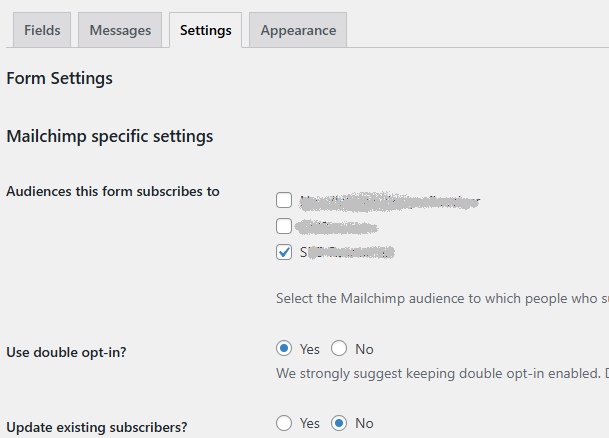
- Choose the correct audience the form subscribes to
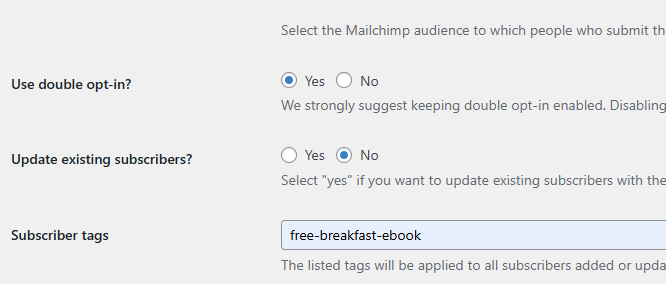
- Tab subscribers (e.g. free-breakfast-ebook)
Connect to MailChimp account

Choose the correct audience the form subscribes to
Tag subscribers
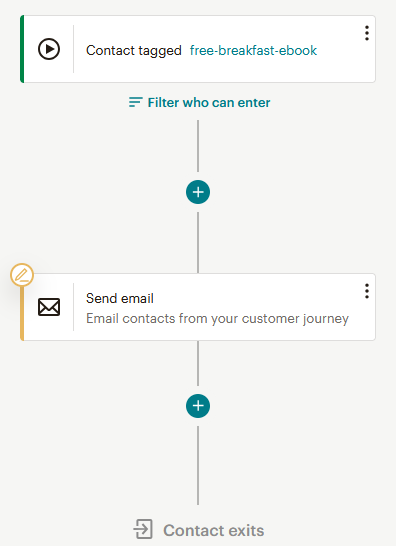
2 – Deliver eBook from Mailchimp
Create customer journey in MailChimp to deliver the eBook to the subscribers with “free-breakfast-ebook” tag.
Note: customer journey is part of the automation in Mailchimp, you have to be on a paid plan to utilize the automation in MailChimp.
Done For You!
However, if you would rather somebody set up this whole process for you, we can definitely help with our Installation and Setup Service. Just send us a support ticket, we will take care of it with a small fee.
Troubleshooting
If you experience some issues, please check if they are listed in this section. Otherwise, please send in a support ticket.
Posts of certain categories are not shown on the homepage
Posts might not appear on homepage. It might look like this:
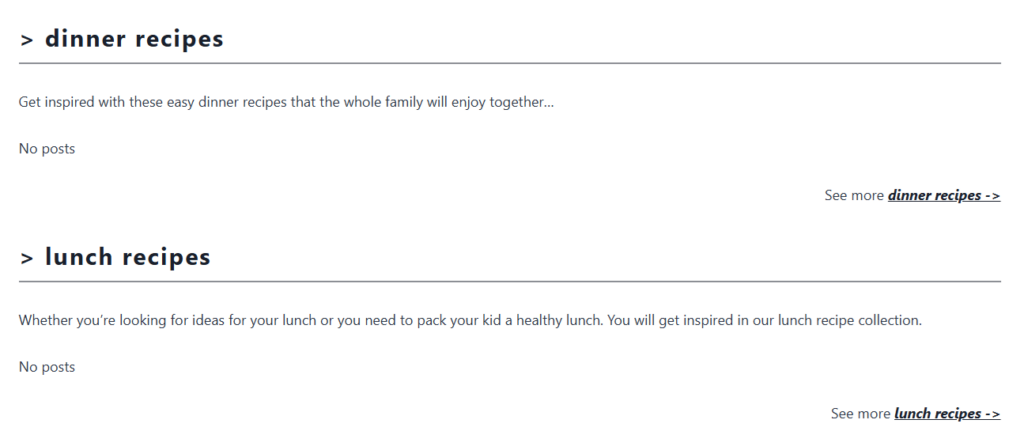
To resolve this, categories need to be re-set in the Post block. Please follow the video below to resolve this issue.
Popular posts and/or seasonal posts are not shown on the sidebar
In this theme, there are 2 sidebar designs. One is used on Recipe Index and All Recipes pages. The other one is used on About page.
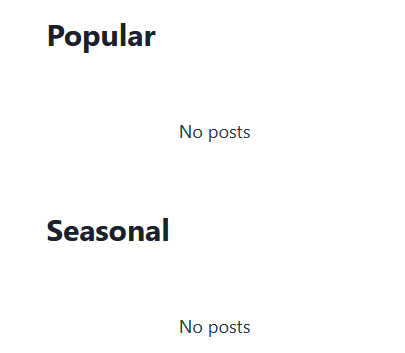
Once the theme is installed and contents are imported. You might notice that on the side bars, no post are displayed for popular recipes or seasonal recipes. They look like this:
To solve this, go to Appearance -> Widgets, locate Sidebar 1 and Sidebar 2.
Expand the sidebar, scroll down to where the popular or seasonal posts block is, and select the block by clicking on the whitespace next to Posts (annotated 1 in the image). The Posts block setting appears on the right, remove the “Seasonal Recipes” tag (annotated 2), then add back. Save the page.
Do the same for “Popular Recipes”. i.e. Remove the tag first, then add it back.

Site menu is not displayed properly in the header
Theme Customizer – Header
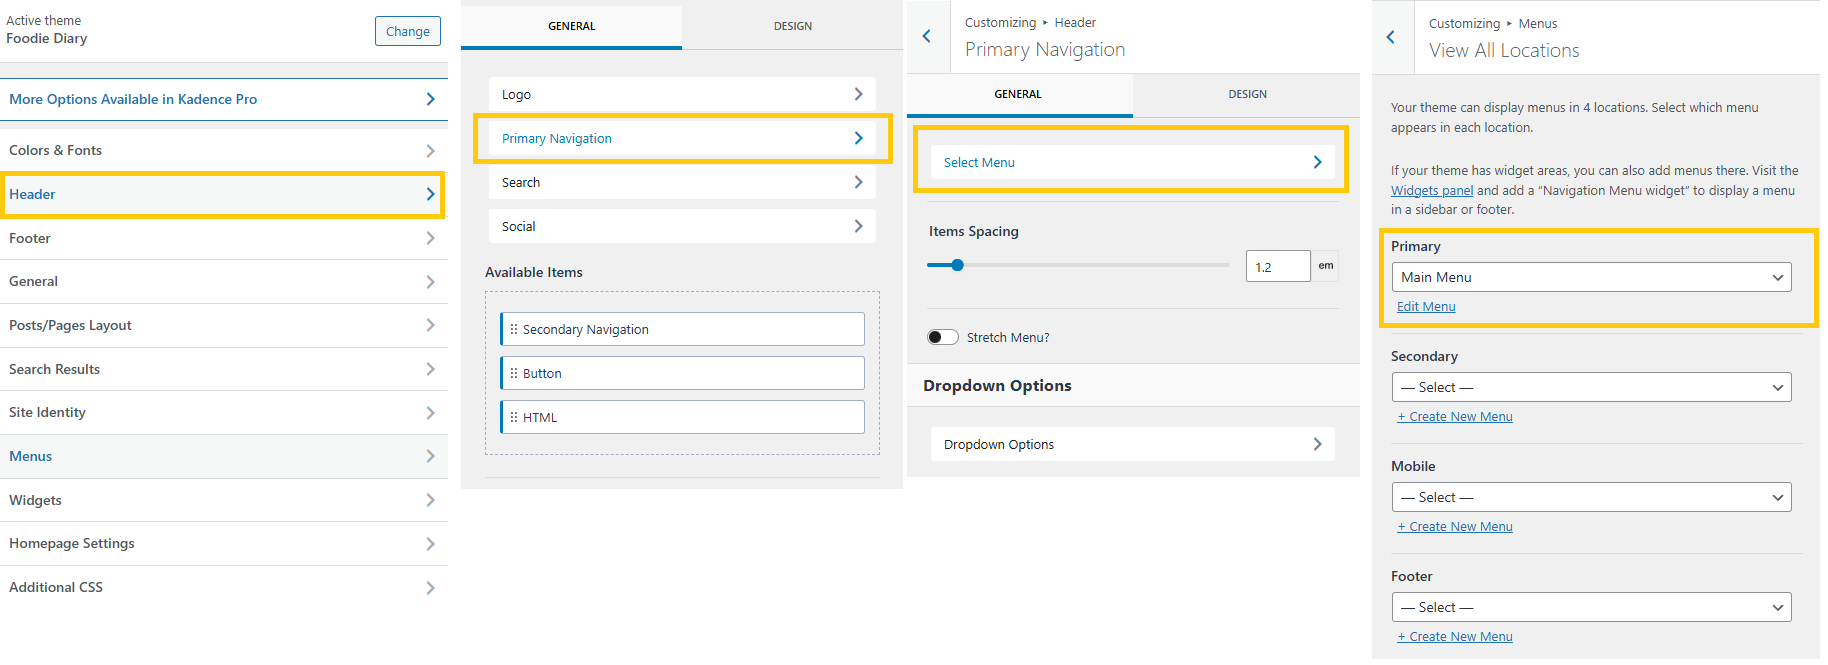
Go to Appearance -> Customize -> Header -> Primary Navigation -> Select Menu -> Choose Main Menu as Primary menu.
Note: you don’t need to create a “Main” menu, it should already exist in the demo content.
Blog Posts are displayed as homepage instead of homepage
Theme Customizer – Homepage Settings
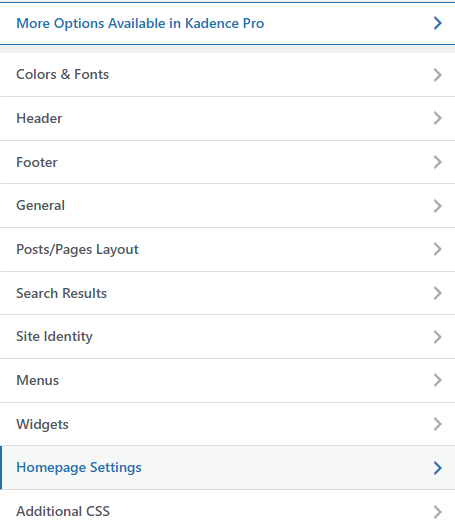
Go to Appearance -> Customize -> Homepage Settings. Make sure the homepage is set to Home & Posts page is set to All Recipes.
Note: Home & All Recipes pages should already exist as the demo content.

Social icons appear with their brand colors instead of the theme accent color
This might be desired behaviour. But if you want to use the theme accent color instead of the brand colors, this video uses Emily Winter theme as an example to show how to make the changes.
Theme Information
Fonts Used
- Base font: System Default. It uses the system fonts that come preinstalled on the device accessing the website. This means that the browser doesn’t need to download any font files, which can make the website load faster.
Plugins Used
- Gutenberg Blocks with AI by Kadence WP – Page Builder Features
- One Click Demo Import
- WP Recipe Maker
- MC4WP:Mailchimp for WordPress
Color Codes Used
You can define the Kadence global colors in your site’s admin dashboard under Appearance > Customize > Colors & Fonts > Colors. There are 9 colors. Please check this article to learn more about what each color is used for. These are the colors used in Emily Winter Theme:
- Accent: #F7F4F3
- Accent – alt: #F6B092
- Strongest text: #1A202C
- Strong text: #2D3748
- Medium text: #504A40
- Subtle text: #4A5568
- Subtle background: #DEC3B2
- Lighter background: #F7FAFC
- White or offwhite: #FFFFFF
Plugins Recommended
WordPress and Kadence
There are many good resource online about WordPress and Kadence.
Kadence has its own Help Center which contains helpful tutorials such as working with header & footer builder, working with Kadence blocks, changing colors and fonts and so on. Additionally, Kadence’s Youtube channel is another good resource.
If you’re new to WordPress, and would like to learn more… WPBeginner has tons of helpful posts and videos to entertain yourself.
And of course, Youtube is the easy and economic way to learn almost anything 🙂
It takes courage to start a new website or decide to change to a new theme. If you have any questions, I am here to answer them. Just send me a message.
