Often we use a freebie as a lead magnet on our website to capture the leads’ emails. Or we collect the emails of those that are interested in our newsletters.
This post shows how to create a form for a freebie offering or the newsletter sign-up. Then embed this form to a WordPress website.
Create a form
We are using form to capture the emails of people who are interested in this freebie. Alternatively you can use landing page, which works the same way.
Go to Landing Pages & Forms under the Grow in the navigation.
If you’ve already created forms, you will see a list of your forms. Otherwise, click the red button “Create new”

After that, you’ll be popped to create a Form or Landing Page.

Choose Form, after that, you’ll be entered into the new form creation flow!
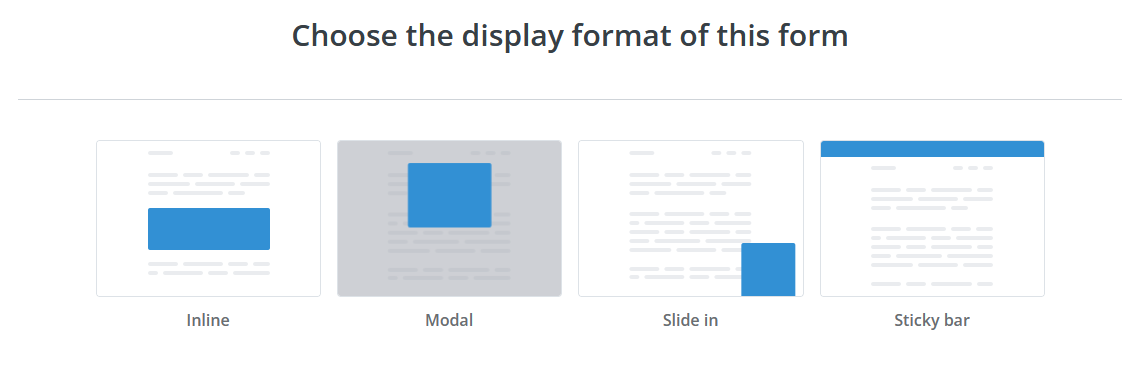
Explanation from ConvertKit: Inline: A form that fits within the content of your page. This option is most commonly used to add a form to blog posts, footers, and sidebars. Modal: A form that pops up based on timing, exit intent, percent of the page scrolled, or even when clicking a link or button. Slide in: A form that slides up from the bottom-right or bottom-left of your site after a certain time or scroll percentage. Sticky bar: A form that shows up at the top or bottom of the page.
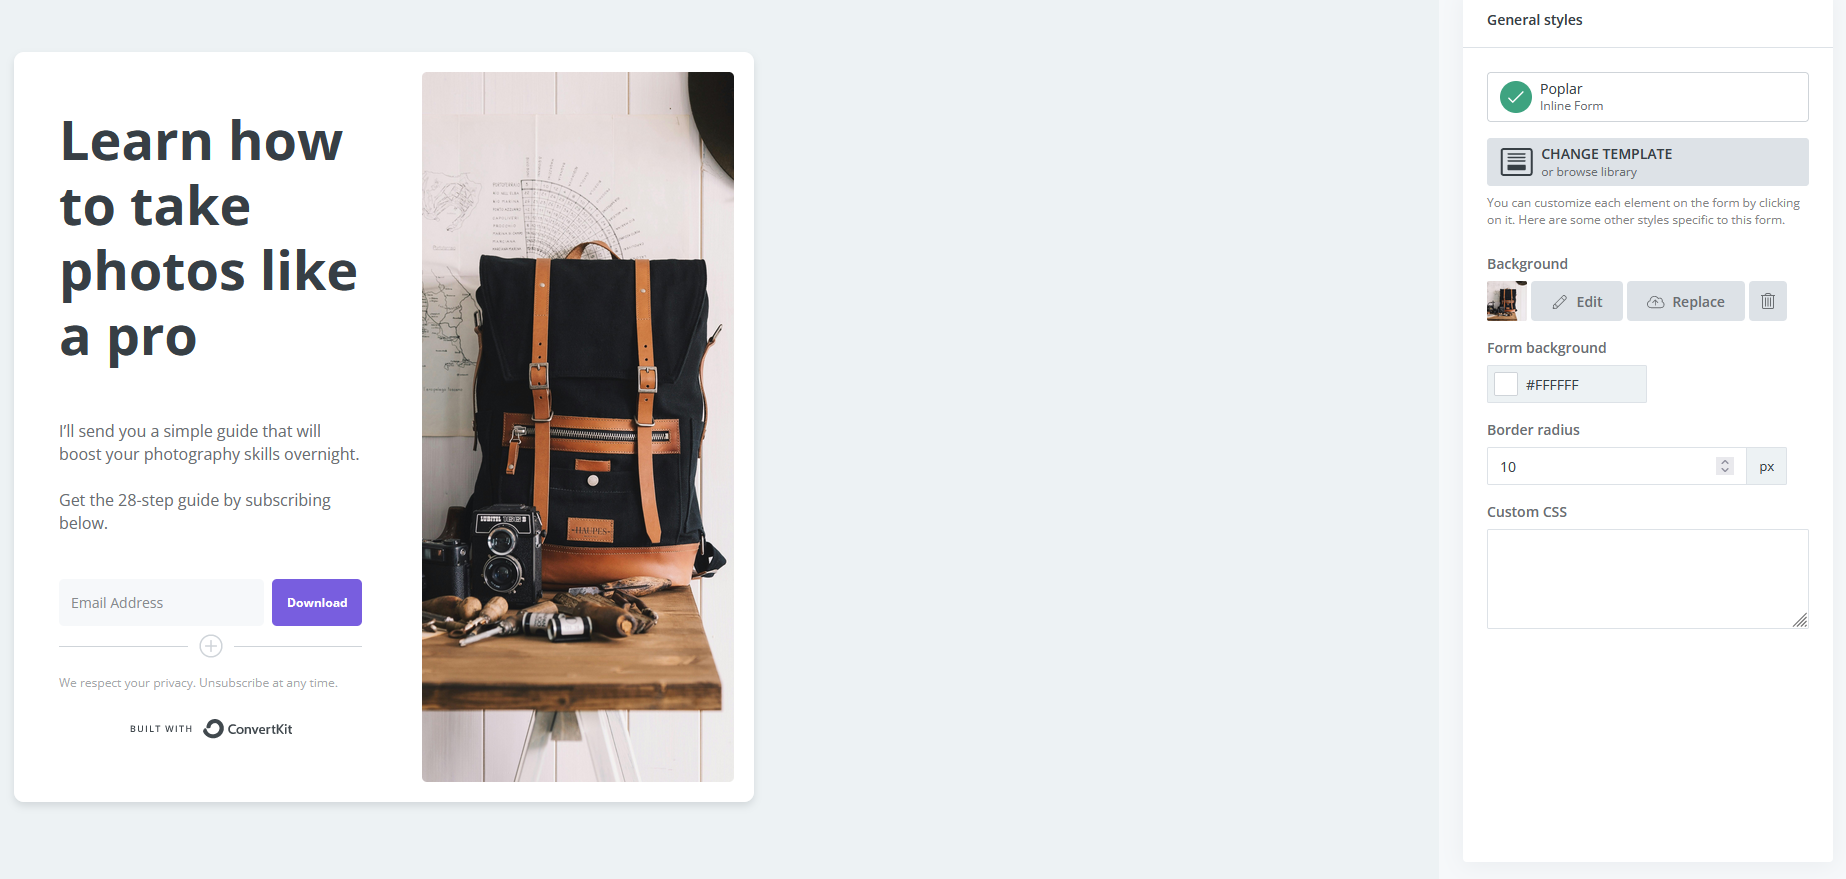
We will use Inline form here. You’ll see a few templates to choose from. Once you’ve selected your template, you can start to customize it the way you like
Configure form settings
Here you decide what happens when a visitor subscribes to the form. You can choose to display a success message or redirect to another page. For example, you can re-direct the subscribers to a product that you are promoting.
Want to learn how to use ConvertKit Commerce to create a product, check out this post.
General Settings
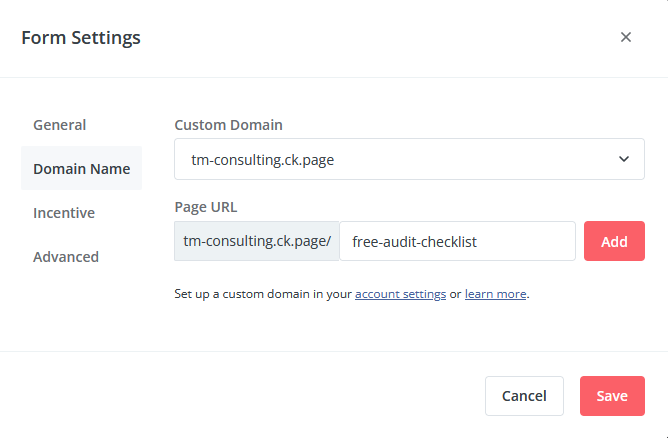
Domain Name
If you have setup a custom domain in the account setting, choose it from the drop-down list. For example: mybusiness.com.
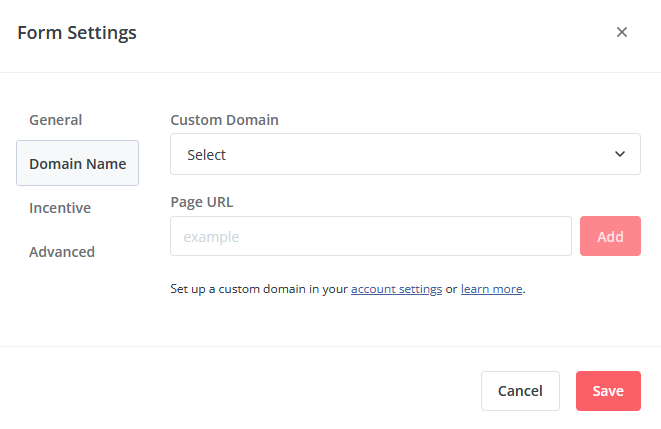
Otherwise, you can always use ConvertKit’s default account domain ck.page. Give the name you like as the page URL. The URL tm-consulting.ck.page/free-audit-checklist is a direct link to your form and will work like any link.
Incentive Email
Incentive email is the email sent right away once the subscriber signs up. I recommend to already use the first option “Send incentive email” to avoid collecting bots in your subscriber list.
Click “Edit Email Contents”, you can change the body text, customize the font, colour etc. to your liking.
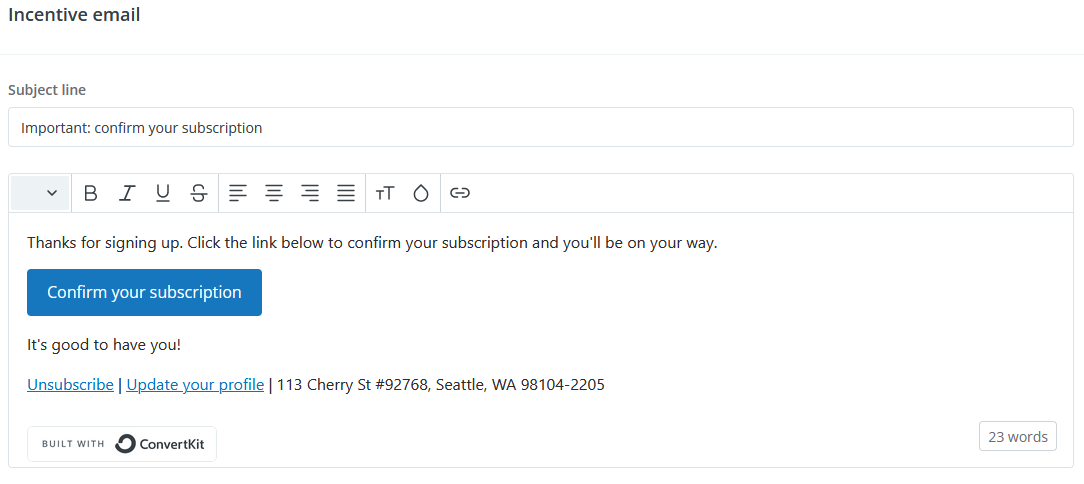
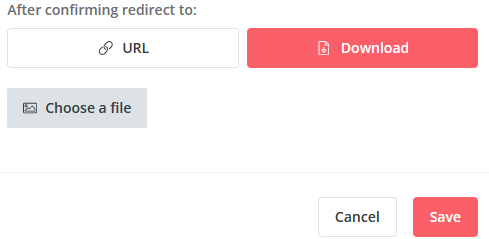
Choose what happens once the subscriber clicks “Confirm your subscription” in this section:
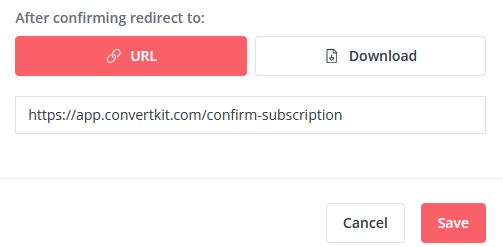
Choose URL if you want to the subscribers to be directed to another URL. ConvertKit provides a link by default.
Choose Download if you want the download to start once the “Confirm your subscription” is clicked. If you choose this option, you will need to upload the file to be downloaded:
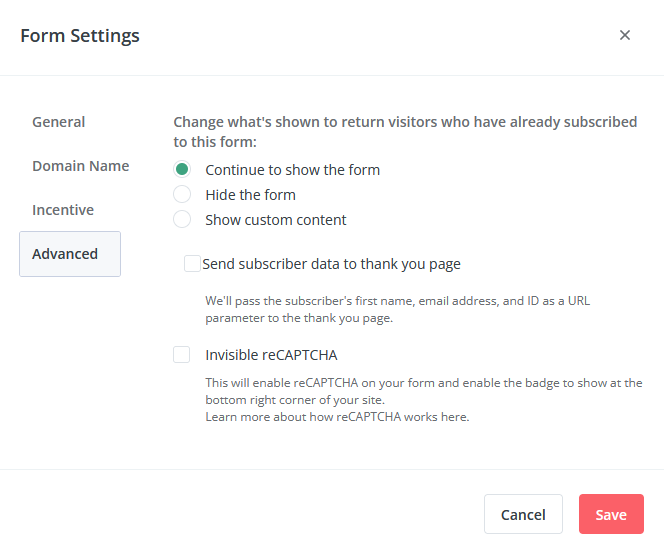
Advanced
Here, you choose the reaction to the visitors who already subscribed.
Once all settings are done, click “Save”.
Congratulations! The form is created!
Embed form to WordPress site
Once you’re satisfied with your form, you can publish it by clicking the red button “Publish” on the top right corner:

A popup will appear during publishing:
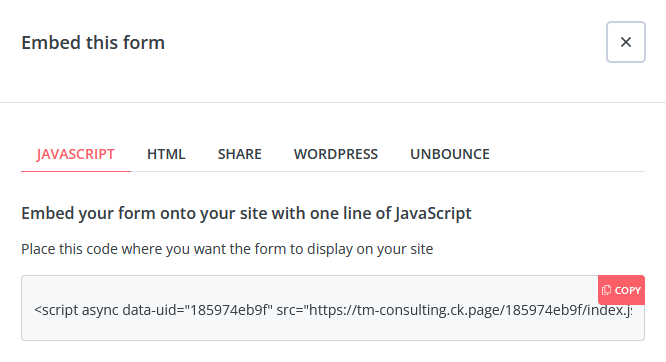
Make a copy of the JavaScript code, head to WordPress site, open the post or page where you like to embed the form. Add a “Custom HTML” block, and paste the code there.